By clicking on the tab > Printer settings < you get to the basic and advanced settings of the printer.
Printer Driver
Displays the printer that was selected when you installed the layout. If you want to use a different printer, reinstall the layout.
Printer-Typ
The printer type installed during layout selection is displayed here.
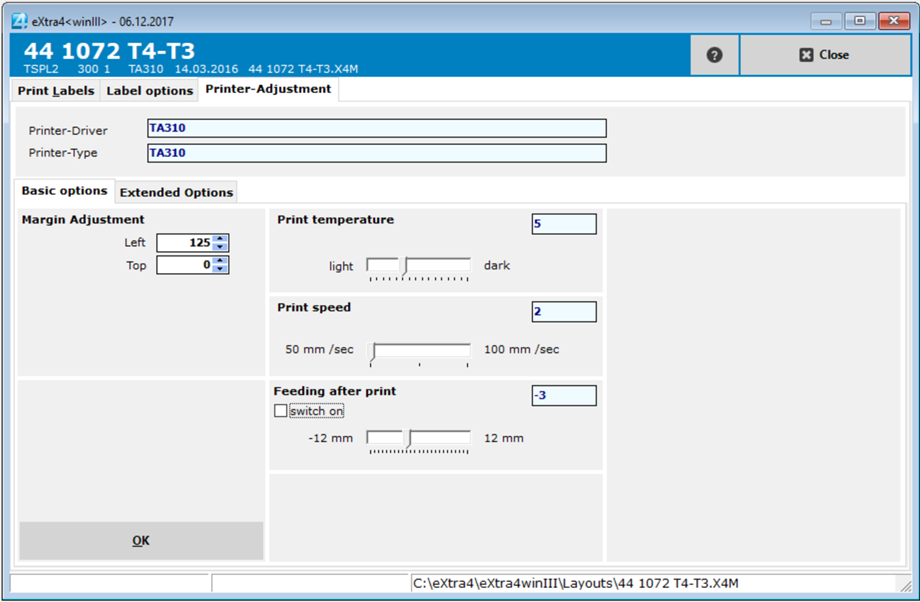
Basic settings
Margin settings
Here the position of the print image as a whole can be shifted on the label.
If the value "Left" is increased, the entire print is shifted to the right.
If the "Top" value is increased, the entire print is shifted downwards.
Print temperature
The blackening of the print image can be adjusted with this controller. To protect the print head, we advise against setting this value to the maximum.
Print speed
With this control the speed of the printer can be adjusted. Because of the small size of jewelry labels, the printing speed is not very high, but the printout at low speed is usually better, we recommend to leave the printing speed at the lowest value.
Printer Feed
By default, the "Enable" checkbox is not checked.
If you want to print individual labels and immediately remove them from the carrier web (single label printing), the checkbox must be activated.
You can use the slider to set the length of the label feed after the label has been printed. The feed rate should only be set high enough so that you can remove the label from the web after printing.
The higher the feed rate after printing, the more the printer must retract the web for printing the next label, which can lead to faults (creasing of the labels)
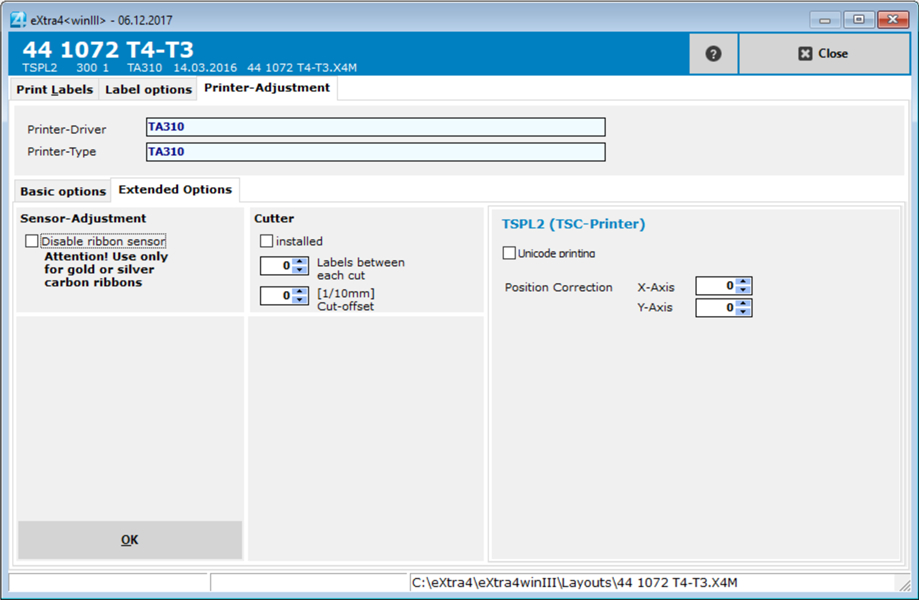
Advanced Settings
Under the item > Advanced settings < you can make further fine adjustments
Sensor settings
If you are using gold or silver (reflective) ribbons, you should turn off the ribbon sensor here. Otherwise the print may report "Ribbon end" as a fault.
Cutter
If a cutter is installed on your printer (usually only for rectangular labels), you can switch on the cutter's functionality with the CheckBox.
You can use the other two input fields to specify how many labels are to be printed before a cut is made. The cut offset can be used to adjust the cut between the labels.
Printer-specific settings
Further settings can be made here depending on the printer brand or printer model.
TSPL2
- If the printer you are using is capable of UNI code, you can activate this function here. For example, to print Arabic, Chinese, or other special characters.
- The position correction function can be used to shift the print image, e.g. for dumbbell labels, so that even areas of the label that cannot be reached via the normal margin settings can be printed.